

Car detailing can be an expensive and time-consuming task, but it doesn’t have to be. With a few DIY car detailing hacks, you can save time and money while still achieving professional-level car cleaning results. In this blog post, we’ll share ten DIY car detailing hacks that will help you get your car looking and feeling its best.
1. Use a Hair Dryer to Remove Stickers and Decals
Removing stickers and decals from your car can be a daunting task, especially when they have been stuck on for a long time. The longer they have been on the surface, the harder they are to remove. Sometimes, the adhesive is so strong that it can leave a sticky residue or even damage the paint job of the car. However, there is a simple and effective way to remove stickers and decals from your car without causing any damage – by using a hair dryer.
First, start by heating up the sticker or decal with a hair dryer. Hold the hair dryer close to the sticker or decal and move it around the edges to ensure that the heat reaches all areas of the sticker or decal. This will make the adhesive soft and pliable, which will make it easier to peel off.
Next, try to peel off the sticker or decal slowly using your fingers or a plastic scraper. Start at one corner and gently pull the sticker or decal away from the surface. If it does not come off easily, reapply heat from the hair dryer to the area and continue to peel it off. Avoid using metal scrapers or sharp objects as they can damage the paint or scratch the surface.
Once the sticker or decal is removed, you may notice some leftover adhesive residue on the surface. To remove this residue, use a cloth or sponge soaked in rubbing alcohol or adhesive remover. Gently rub the residue until it dissolves or comes off. Make sure to wash and dry the surface afterward.
2. Clean Your Headlights with Toothpaste
If your car’s headlights are looking cloudy or yellowed, it can be difficult to see clearly at night, which can be a safety hazard. Replacing the headlights can be expensive, but there is a simple and affordable solution that you can do at home – using toothpaste.
Toothpaste is an effective abrasive cleaner that can remove dirt and grime from the surface of the headlights. It can also help to remove the layer of oxidation that causes the cloudiness and yellowing.
To start, clean the headlights with soap and water to remove any loose dust and debris. Then, apply a small amount of toothpaste to a soft-bristled toothbrush and use it to scrub the headlights in a circular motion. Make sure to cover the entire surface of the headlight and apply more toothpaste as needed.
Continue scrubbing for a few minutes, then rinse the headlights with water to remove the toothpaste. Make sure to rinse thoroughly to remove all traces of the toothpaste. Use a clean cloth to dry the headlights and remove any remaining dirt or debris.
Once the headlights are dry, you should notice a significant improvement in their clarity and brightness. If necessary, you can repeat the process to further improve the results.
3. Use a Magic Eraser to Remove Stubborn Stains
Magic Erasers are a popular cleaning tool that can be used to clean a wide variety of surfaces, including your car’s interior. They are made of a unique material that works as an abrasive cleaner, making them perfect for removing stubborn stains and dirt from surfaces like vinyl, plastic, and leather.
To use a Magic Eraser on your car’s interior, start by wetting the sponge with water. Squeeze out any excess water, as you don’t want to saturate the interior surfaces of your car. Then, gently rub the Magic Eraser over the stain or dirt, using a circular motion. Make sure to use a light touch, as too much pressure can damage the surface you are cleaning.
As you rub the Magic Eraser over the stain, you will see that it starts to break down and come off the surface. If the stain is particularly stubborn, you may need to apply a little more pressure or use a bit more water to help loosen it up.
Once you have finished cleaning the stain, wipe the area clean with a damp cloth to remove any residue from the Magic Eraser. You can then dry the area with a clean towel to prevent any water spots.
It’s important to note that while Magic Erasers are a great tool for removing stains and dirt from your car’s interior, they can also be abrasive. Make sure to test the Magic Eraser on a small, inconspicuous area first to ensure that it won’t damage the surface you are cleaning.
Our Top Magic Eraser Picks
(Paid Links)
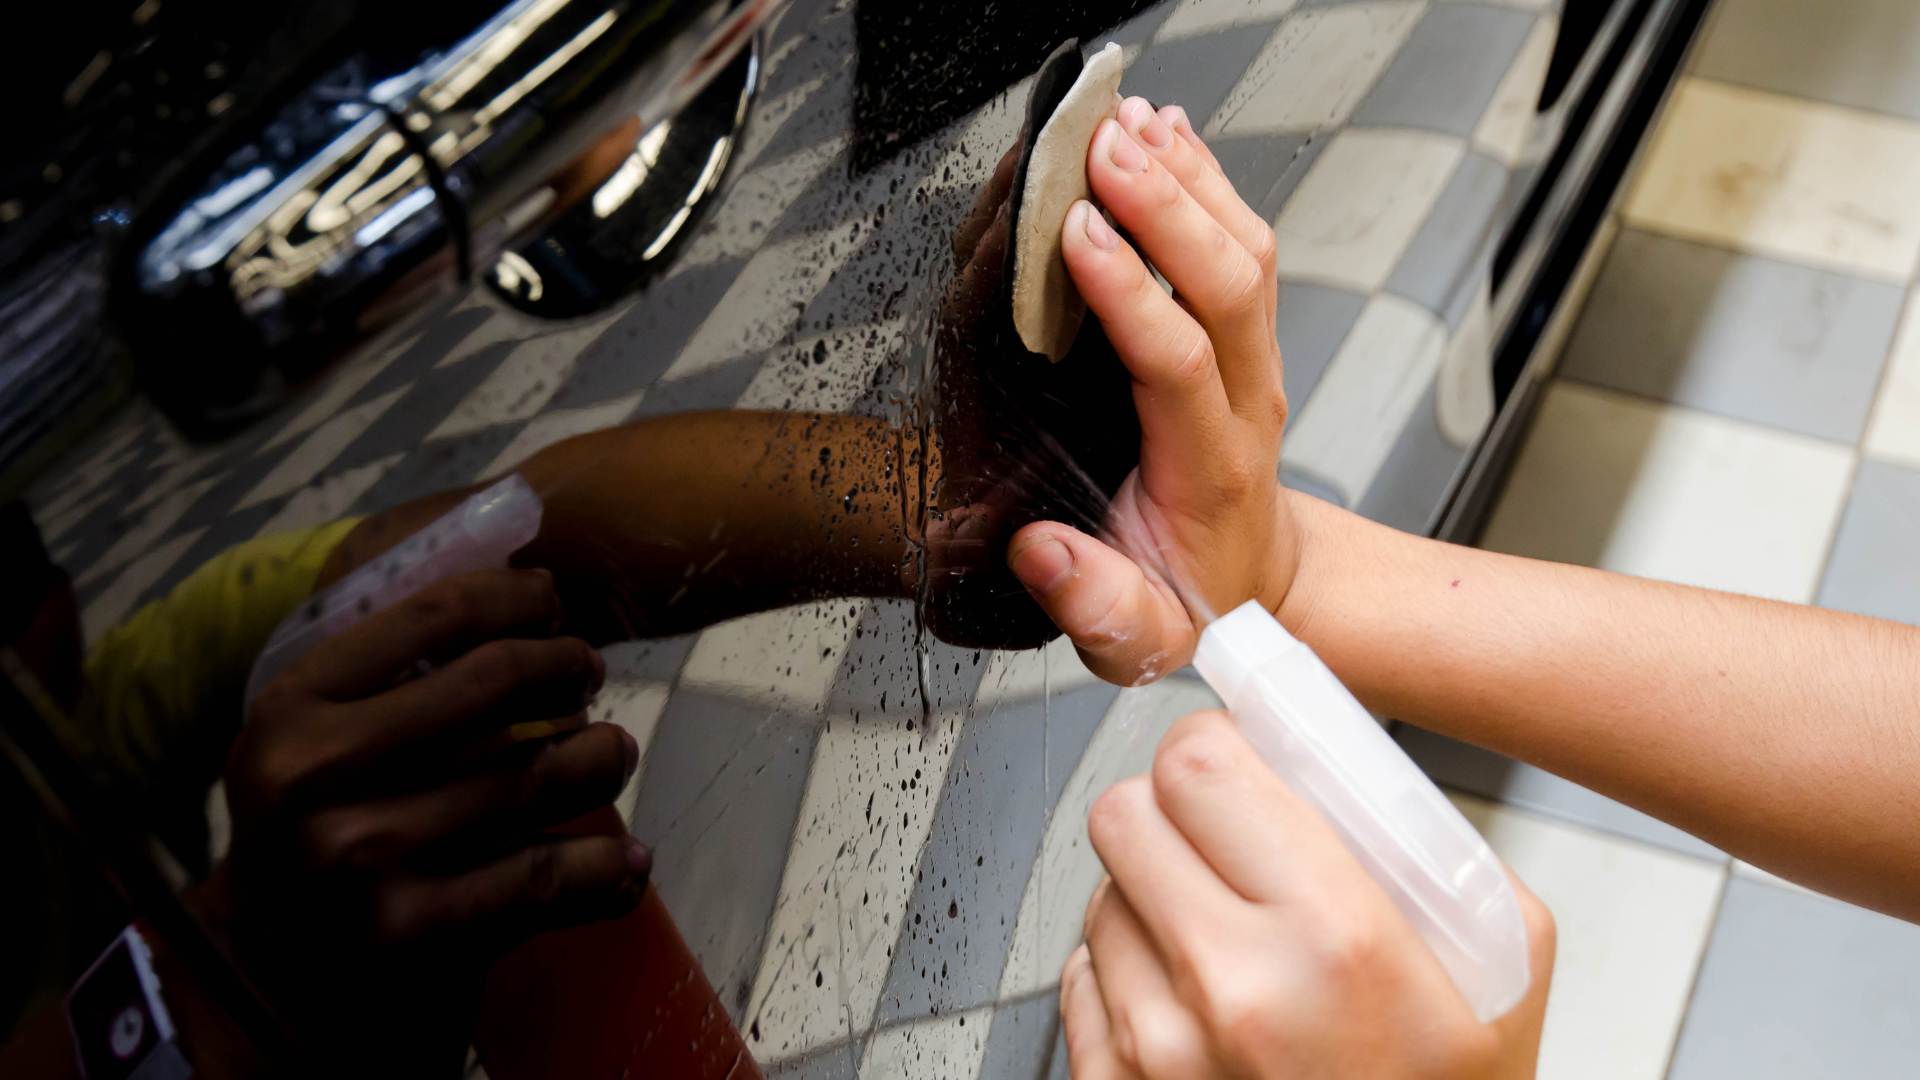
4. Use a Clay Bar to Remove Contaminants from Your Paint
If you’ve noticed that your vehicle’s paint feels rough to the touch, it’s likely that contaminants like dirt, tar, and tree sap have built up on the surface. These contaminants can be difficult to remove with traditional washing methods, and if left untreated, they can cause damage to your car’s paint job. However, there is a simple and effective solution – using a clay bar.
A clay bar is a soft, malleable material that is designed to safely remove contaminants from your car’s paint. To use a clay bar, start by washing and drying your car to remove any loose dirt and debris. Then, apply a clay lubricant to the area you want to clean. This lubricant helps to reduce friction between the clay bar and the paint, preventing damage to the surface.
Next, take the clay bar and flatten it out into a small, palm-sized piece. Gently rub the clay bar over the lubricated surface in a back-and-forth motion, using light pressure. You should be able to feel the clay bar pulling the contaminants off the paint as you move it over the surface. Make sure to knead the clay bar frequently to expose a fresh, clean surface.
Once you have finished using the clay bar, wipe the surface with a clean microfiber towel to remove any residue. You may notice that your vehicle’s paint feels much smoother and looks brighter after using a clay bar.
It’s important to note that using a clay bar should be done sparingly, as overuse can damage the paint. It’s also important to use a high-quality clay bar and lubricant to prevent scratching or marring of the paint.
Our Top Clay Bar Picks
(Paid Links)
5. Use a Lint Roller to Clean Your Upholstery
Lint rollers are a versatile cleaning tool that can be used for a variety of purposes, including cleaning your car’s upholstery. If you have pets, or if you frequently drive with the windows down, you may have noticed that your vehicle’s upholstery can quickly accumulate dust, dirt, and pet hair. A lint roller is a quick and easy solution to remove these contaminants from your automobile’s interior surfaces.
To use a lint roller on your car’s upholstery, start by selecting a high-quality lint roller with a sticky surface that will effectively pick up debris. Roll the lint roller over the seats and carpets of your car, applying light pressure to pick up pet hair, dust, and other debris. You may need to roll over the same area multiple times to ensure that you have removed all of the contaminants.
Lint rollers can also be used on other surfaces inside your car, such as the dashboard, console, and door panels. They are particularly effective at picking up dust and crumbs from these surfaces.
It’s important to note that lint rollers should not be used on delicate surfaces, such as leather or suede. If you need to clean these surfaces, use a soft brush or a specialized cleaner designed for the material.
6. Use Olive Oil to Condition Leather Seats
If you have leather seats in your car, it’s important to keep them clean and well-maintained to prevent cracking and drying out. While there are many leather conditioning products available on the market, there is a simple and natural solution that you may already have in your kitchen – olive oil.
To condition your vehicle’s leather seats using olive oil, start by cleaning the seats with a mild soap and water solution. Once the seats are dry, apply a marble-sized amount of olive oil to a soft cloth. You only need a few drops of oil to condition the leather, so make sure to apply it sparingly.
Rub the cloth gently over the surface of the leather, making sure to cover the entire surface. Pay special attention to any areas that are prone to cracking or drying out, such as the seams or edges of the seats. Make sure to apply the olive oil evenly and avoid applying too much in one area.
Once you have applied the olive oil to the leather seats, let it sit for a few minutes to absorb into the leather. Then, use a clean, dry cloth to wipe away any excess oil. Make sure to buff the leather seats with the cloth to remove any remaining oil and give them a nice shine.
It’s important to note that while olive oil is a natural and effective leather conditioner, it should only be used on real leather seats. If your vehicle’s seats are made from synthetic materials, such as vinyl or pleather, olive oil can actually damage the material and cause it to break down.
7. Use Coffee Filters to Clean Your Windows
If you’re tired of using paper towels or rags to clean your car’s windows only to end up with streaks and lint, there is a simple and effective solution that you may already have in your kitchen – coffee filters. Coffee filters are an inexpensive and efficient way to clean your automobile’s windows without leaving any streaks or lint behind.
To use coffee filters to clean your vehicle’s windows, start by wetting the filter with water. You only need a small amount of water, so make sure to wring out any excess liquid. Then, use the coffee filter to wipe down the windows, making sure to cover the entire surface. The coffee filter will effectively pick up dirt, grime, and other contaminants from the surface of the window.
Once you have wiped down the window with the coffee filter, use a clean, dry cloth to dry the surface. You should notice that the window is streak-free and free of lint, thanks to the unique properties of the coffee filter.
Coffee filters are also effective at cleaning other surfaces inside your car, such as the dashboard and console. They are particularly useful for removing dust and debris from these surfaces.
8. Use a Toothbrush to Clean Your Air Vents
If you’ve noticed that the air quality in your car is not as good as it used to be, it may be time to clean your air vents. Air vents can be a magnet for dust, dirt, and other debris, which can accumulate over time and reduce the efficiency of your vehicle’s heating and cooling system. Cleaning your air vents can be a difficult task, but with the help of a toothbrush and a simple cleaning solution, you can get the job done quickly and easily.
To clean your vehicle’s air vents using a toothbrush, start by mixing a solution of equal parts water and vinegar in a bowl. Dip the toothbrush in the solution, making sure to saturate the bristles. Then, use the toothbrush to gently scrub the air vents, working in a back-and-forth motion to remove any dust, dirt, or other debris. Make sure to get into all the crevices and corners of the vents to ensure a thorough cleaning.
Once you have finished scrubbing the vents with the toothbrush, use a damp microfiber to wipe away any excess vinegar solution. Then, use a dry microfiber to wipe the vents dry.
Not only will cleaning your vehicle’s air vents improve the air quality in your car, but it can also help to reduce any unpleasant odors that may be present.
It’s important to note that if your vehicle’s air vents are heavily soiled, you may need to repeat the cleaning process a few times to achieve the desired results. Additionally, if you have allergies or respiratory issues, it’s a good idea to wear a mask to prevent any dust or debris from entering your airways while cleaning the vents.
9. Use a Foam Brush to Clean Your Dashboard
Keeping your car’s dashboard clean is important not only for aesthetic reasons, but also to prevent damage from dirt and grime buildup. However, cleaning your dashboard can be a difficult task, especially if it has intricate details or hard-to-reach areas. Fortunately, there is an inexpensive and effective tool that can make the job easier – foam brushes.
Foam brushes are a versatile cleaning tool that can be found at most hardware or craft stores. To clean your vehicle’s dashboard using a foam brush, start by mixing a solution of water and a few drops of dish soap in a small bowl. Dip the foam brush in the solution, making sure to saturate the bristles. Then, use the foam brush to gently scrub the dashboard, working in a circular motion to remove any dirt and grime. Pay special attention to any hard-to-reach areas or intricate details on the dashboard.
Once you have finished scrubbing the dashboard with the foam brush, rinse the surface with water and use a clean microfiber to wipe away any excess soap and water. Make sure to dry the dashboard with a clean microfiber to prevent water spots or streaks.
Foam brushes can also be used to clean other surfaces inside your car, such as the seats, door panels, and console. They are particularly useful for getting into small crevices and hard-to-reach areas that may be difficult to clean with a regular microfiber or sponge.
It’s important to note that you should avoid using abrasive cleaners or harsh chemicals on your automobile’s dashboard, as these can cause damage to the surface. Stick to mild cleaning solutions and gentle tools like foam brushes to ensure that your dashboard stays clean and well-maintained.
10. Use a Rubber Band to Remove Pet Hair
If you have pets and frequently take them on car rides, you know how difficult it can be to remove pet hair from your car’s upholstery. Pet hair can cling to fabrics and be difficult to pick up with traditional cleaning tools. However, there is a simple and effective solution that you may already have at home – a rubber band.
To remove pet hair from your automobile’s upholstery using a rubber band, start by wrapping the rubber band around your fingers. Make sure to choose a rubber band that is wide enough to cover your fingers and has enough tension to pick up the pet hair.
Then, gently rub your fingers over the upholstery, using the rubber band as a tool to pick up the pet hair. The rubber band will create static electricity that helps attract and lift the pet hair from the surface of the fabric.
Once you have removed as much pet hair as possible with the rubber band, use a vacuum cleaner or lint roller to pick up any remaining hair or debris. You may need to repeat the process a few times to achieve the desired results.
In addition to being an effective tool for removing pet hair from your car’s upholstery, rubber bands can also be used to remove pet hair from other surfaces inside your car, such as the dashboard or console. They are an inexpensive and convenient solution that can help keep your car looking clean and free of pet hair.
Final Thoughts
Looking to give your car a professional-level clean without breaking the bank? These DIY car detailing hacks are just what you need. Whether you need to remove stubborn stains, clean your vents, or condition your leather seats, these hacks will help you achieve the results you’re looking for, all while saving you time and money.
However, if you’re looking for a more comprehensive cleaning experience or simply don’t have the time to tackle the work yourself, consider booking a session with a professional car detailer. With Car Detailing Finder, you can easily browse a massive database of trusted auto detailing professionals in your area and book a detailing session that fits your schedule and budget.
Whether you choose to use these DIY car cleaning hacks or opt for a professional detailing session, the most important thing is to keep your car clean and well-maintained. By doing so, you can extend the life of your vehicle, improve its performance, and enjoy a comfortable and enjoyable driving experience.